 Tile Studio II
Tile Studio II has support for LUA scripting. You can add scripts to your project and set them up to run when you press a function key (F1 – F12). Here is a little example of a script:
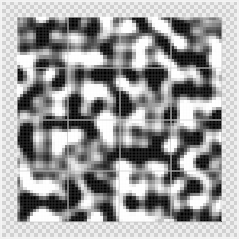
-- MENU_ITEM: PerlinNoise [F7]

function PerlinNoise()
  NoiseSeed(123);
  ModifyBuffer(f);
end

function f(x, y, w, h, bp)
  bp.Offset = 20 * Noise2(x/5, y/5) - 10;
  bp.Alpha = 255;
  return bp;
end
The function ModifyBuffer calls the given function f for every pixel of the buffer, NoiseSeed and Noise2 are functions provided by Tile Studio II. Running this function gives the following Perlin Noise pattern:
Most functions will look similar to the one above. The function f provides a value for every pixel, which can depend on the position (x, y), the size of the tile (w, h) and the value of the original pixel in the buffer (bp).
Pixels are represented as a Gradient (0 = first, 1 = second, etc), Offset (0 = center, -1 = one entry to the left, 1 = one entry to the right, etc., and Alpha (0 = fully transparent, 255 = fully opaque).
You can use the log function to show debug information, that will be shown on the console window, for example:
log("a=", a);
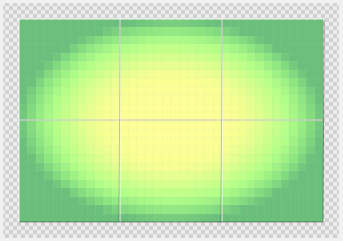
Here is another example script, this one creates a circular gradient:
-- MENU_ITEM: CircularGradient [F4]

function CircularGradient()
  ModifyBuffer(CG);
end

function CG(x, y, w, h, bp)
  bp.Alpha = 255;
  local xx = 0.5*w-0.5-x;
  local yy = 0.5*h-0.5-y;
  local aa = 5*(xx/w * xx/w) + 3*(xx/w * xx/w);
  local bb = 5*(yy/h * yy/h) + 3*(yy/h * yy/h);
  bp.Offset = 5 - 2.5*(aa+bb);
  if (bp.Offset < 0) then
    bp.Offset = 0;
  end
  return bp;
end
This produces the following result:
Export scripts use the function GetExportData(), which generates a structure containing the bitmaps, maps and layers that can be exported. Here is an example of an export script:
-- MENU_ITEM: Export [F10]

function Export()
  local prj = GetExportData();
  for i = 0, prj.TilesheetCount - 1, 1 do
    ts = prj.Tilesheets[i];
    log(ts.Name);
    prj.Tilesheets[i]:SaveImage("ts_" .. ts.Name .. ".png");
  end;
  for i = 0, prj.MapCount - 1 do
    map = prj.Maps[i];
    log(map.Name);
    for j = 0, map.LayerCount - 1 do
      layer = map.Layers[j];
      layer:Export("lyr_" .. layer.Name .. ".txt", "[[", ",", "],\n[", "]]");
    end;
  end;
end;
This script calls the Tilesheets.SaveImage and Layers.Export functions to save the bitmaps and the map data. The location where the files will be saved depends on your projects active configuration (OutputPath).
More examples and the complete structure of ExportData should be available soon.
The following is only available in the Indie and Pro version
In the Tile Designer, you can use the Code property to use scripting to modify your tiles. Here is an example, the following map only uses one tile and all edges are done by scripting:
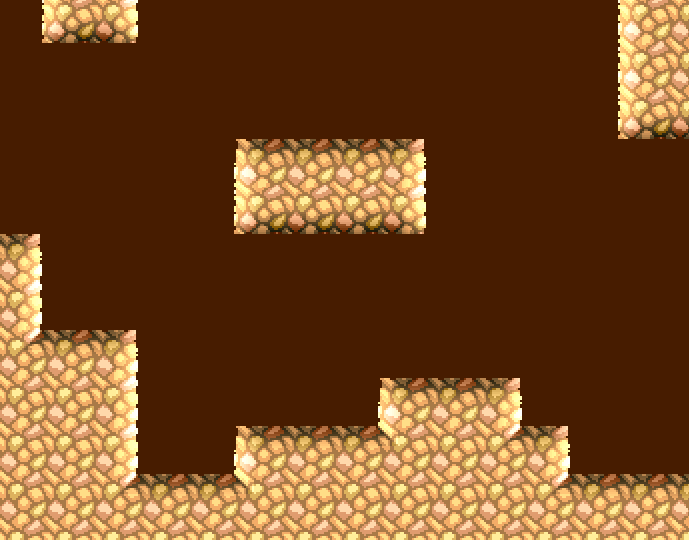
Here is the script:
-- adjust these for amount of light/shadow

local amount_x = 1.0;
local amount_y = -1.0;

-- use with 3x3 tiles

local corners = 0;
function OuterEdges()
  corners = 0;
  ModifyBuffer(ChangeEdges);
end;

-- use with 2x2 tiles

function InnerCorners()
  corners = 1;
  ModifyBuffer(ChangeEdges);
end;

function f(x, y, a, b)
  r = (a + b) / 2;
  if (x < y) then r = a; end;
  if (x > y) then r = b; end;
  return r;
end;

function ChangeEdges(x, y, w, h, bp)
  top = 0;
  left = 0;
  right = 0;
  bottom = 0;

  if (group_y == 0) then top = 1; end;
  if (group_x == 0) then left = 1; end;
  if (group_x == group_w - 1) then right = 1; end;
  if (group_y == group_h - 1) then bottom = 1; end;

  dx = (x - w / 2) / 3;
  dy = (y - h / 2) / 3;
  ex = 0;
  ey = 0;

  if (corners == 1) then
    if (top + left == 2) and (dx > 0) and (dy > 0) then
      a = Math.Min(Math.Abs(dx), Math.Abs(dy));
      bp.Offset = bp.Offset + f(x, y, amount_x * a, amount_y * a);
    end;
    if (top + right == 2) and (dx < 0) and (dy > 0) then
      a = Math.Min(Math.Abs(dx), Math.Abs(dy));
      bp.Offset = bp.Offset + f(w - 1 - x, y, amount_x * a, amount_y * a);
    end;
    if (bottom + left == 2) and (dx > 0) and (dy < 0) then
      a = Math.Min(Math.Abs(dx), Math.Abs(dy));
      bp.Offset = bp.Offset + f(x, h - 1 - y, amount_x * a, amount_y * a);
    end;
    if (bottom + right == 2) and (dx < 0) and (dy < 0) then
      a = Math.Min(Math.Abs(dx), Math.Abs(dy));
      bp.Offset = bp.Offset + f(w - 1 - x, h - 1 - y, amount_x * a, amount_y * a);
    end;
  else
    if (top == 1) and (dy < 0) then
      ey = h / (y + 1 + 1) - bp.Offset;
      bp.Offset = bp.Offset - amount_y * (dy + ey / h);
    end;
    if (left == 1) and (dx < 0) then
      ex = w / (x + 1 + 1) - bp.Offset;
      bp.Offset = bp.Offset - amount_x * (dx + ex / w);
    end;
    if (right == 1) and (dx > 0) then
      ex = w / (w - x + 1) - bp.Offset;
      bp.Offset = bp.Offset + amount_x * (dx + ex / w);
    end;
    if (bottom == 1) and (dy > 0) then
      ey = h / (h - y + 1) - bp.Offset;
      bp.Offset = bp.Offset + amount_y * (dy + ey / h);
    end;
  end;

  if (ex > w / 2 or ey > h / 2) then
    bp.Alpha = 0;
  end;

  return bp;
end
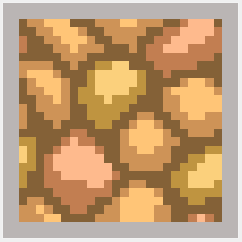
In the tilesheet we place our one tile everywhere, but after setting up the script it looks like this:
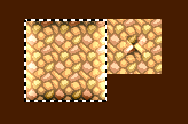
The 3 x 3 selected tiles here have the property Code set to OuterEdges(); and the 2 x 2 tiles at the right have InnerCorners();
To make it work properly, the code needs to know what the function is of each of the tiles. For that we have the GroupPos and GroupSize properties. The left part has 3×3 as size and the right part 2×2. Each tile has it’s own index (0,0), (0,1), … (2,2). This is automatically set up every time you make a selection like this and copy properties to all tiles in the designer.
After having this set up, you can easily add new grounds by only drawing one new tile.